Summary: In this Article, you’ll get to read about —
| Summary: In this piece of article we are trying to educate the Windows users regarding the “Cyclic Redundancy Check” error. The error causes as well solutions are explained herein detailed manner. In brief, here you will find out about—
|
Cyclic Redundancy Check (CRC) is the term used for the method of data verification used by computing devices to keep a check on the accuracy of data. The CRC system tracks the changes taking place in the raw data which is stored in the storage media.
The CRC errors simply define that malfunctioning of non-functional behavior of CRC. This can happen due to the corruption of system registry file, interrupted software installation, poor file configuration, or hard drive errors. CRC error is quite a noteworthy issue which needs to be resolved on an immediate basis or else it would end up damaging your system and causing you loss of data. So, let’s get started without wasting any further second—
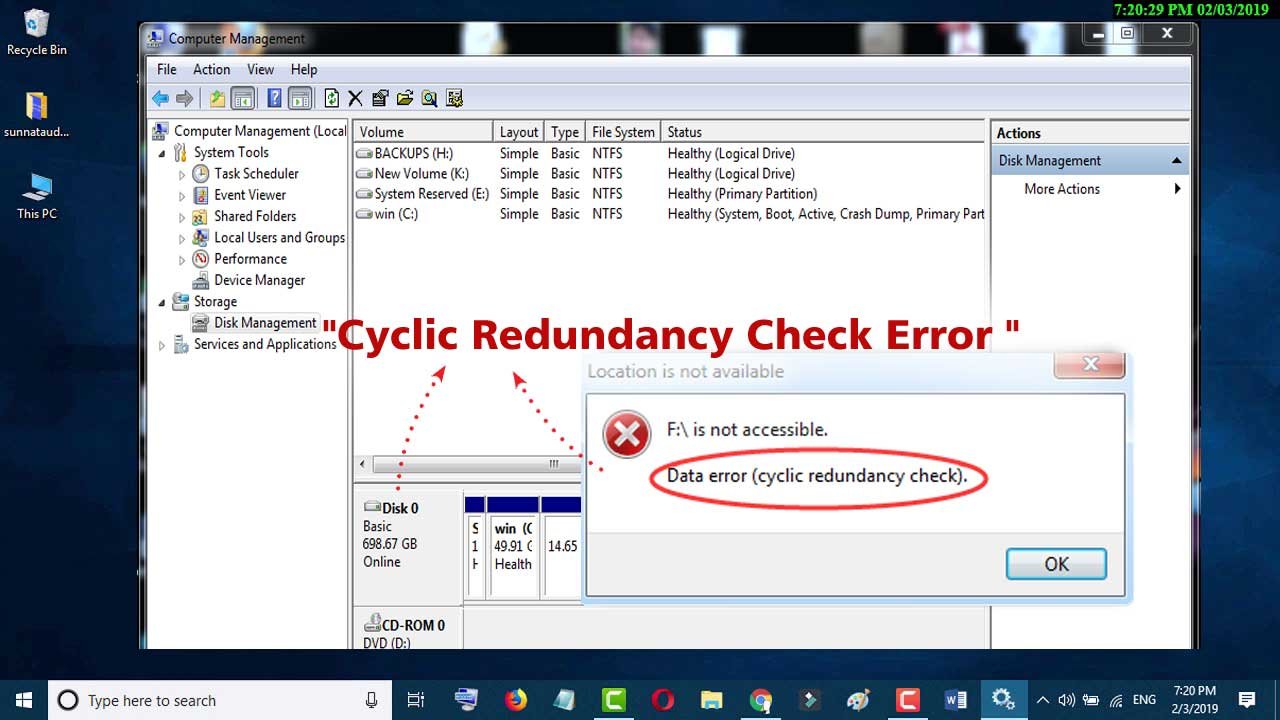
The Error Message You Get
“File xxxx.pst could not be accessed. Data error. Cyclic redundancy check.”
Reason For The Error
This issue mainly originates from the corrupt PST file. The damage can occur due to bad drive sectors, damaged file system, virus, and malware.
Solution
The issue can be resolved using four different solutions. But first, you must close the applications in which PST files are being used.
Let’s Uncover the Troubleshooting Methods
Method 1: Recreate the File
This method is suitable only for those who can take the risk on data stored in the PST file. Make sure that the data stored in the corrupt PST file is not of your use and you can afford losing it. Once you delete the file, the issue will be resolved and a new PST file will be formed on your device. With this method, you can get rid of the issues but the data will be deleted along with the PST file. So, go for this method only in the case where the data stored in the file isn’t very crucial.
Method 2: Fix the Hard Drive Related Errors using CHKDSK Utility Tool
If the storage volume is creating the error, you can fix the error by scanning the volume using “CHKDSK” utility. This program in Windows is mainly designed to scan and repair the bad sectors, file system corruption along with other such factors that cause the cyclic redundancy check data error on your device. So, in order to remove CRC error, run “CHKDSK” utility tool on your device via following these steps—
- First, go to the Start menu>>All programs and type ‘cmd’ to open the Command Prompt app.
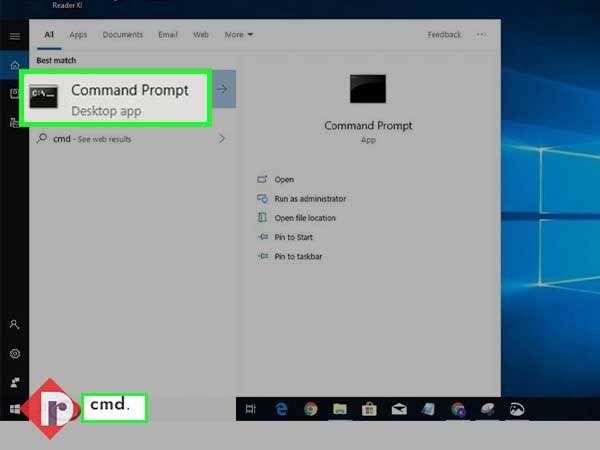
- Then, click right on ‘Command Prompt’ to ‘Run as Administrator’ option from the contextual menu.
- In doing so, a command prompt window will open and inside it, type the “chkdsk F: /f or chkdsk F: /f /r /x” in the Disk part and hit the ‘Enter’ button.
[Note: You have to replace ‘F:’ [drive name] with the drive letter of your hard drive which has the Cyclic Redundancy Check error.
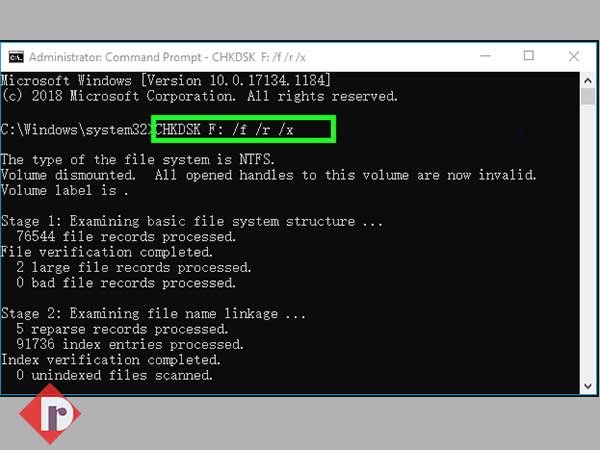
- In doing so, the tool will rigorously scan the issue and try to fix it completely.
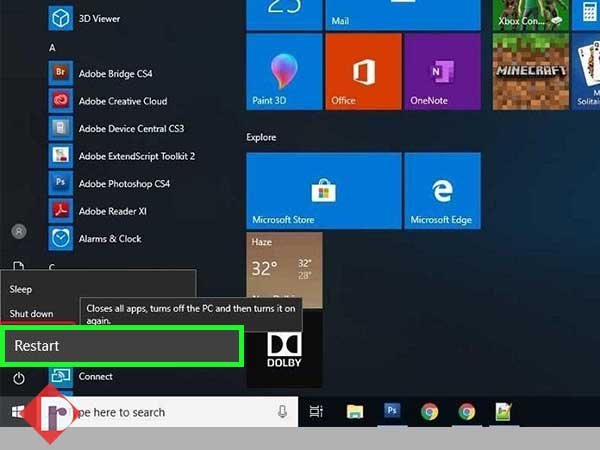
- Now, you can give a quick restart to your device to check whether your device is accessible and workable now or not.
However, if the CRC error continues even after running this utility tool, one can try repairing the PST file. Because the corrupt PST file can be another possible reason for this.
Method 3: Repair the PST File Using the scanpst.exe Tool
- Open the file explorer and type SCANPST.EXE in the search bar
- The default location of Inbox Repair Tool on Outlook is:
- Outlook 2016, go to C:\Program Files\Microsoft Office\Office16
- Outlook 2013, go to C:\Program Files\Microsoft Office\Office15
- Outlook 2010, go to C:\Program Files\Microsoft Office\Office14
- Outlook 2007, go to C:\Program Files\Microsoft Office\Office12
- Open the SCANPST.EXE
- Click on “Start” to initiate the process of scanning.
- After completing the scan, the tool will display the results and fix the errors.
- Once the tool is done scanning, restart your Outlook device.
Method 4: Run SFC Scan
System File Checker is used to fix Windows system files including Windows DLL files, registry files, or other secure files. Sometimes due to the damaged file system or registry files, CRC (Cyclic Redundancy Check) error happens.
The SFC scan discovers the file issue and swaps the corrupt or damaged file with a new one. The whole process can take about 5 to 20 minutes reliant on the size and volume of the file. To start the SFC scan, follow below bullet steps:
- Connect the storage drive
- Tap the Windows symbol to open the search bar
- Write cmd. Right-tap on ‘Command Prompt’ and choose ‘Run as Administrator’ from the options
- Type SFC /scan now in the cmd box and press the ‘Enter’ button to start the SFC scan.
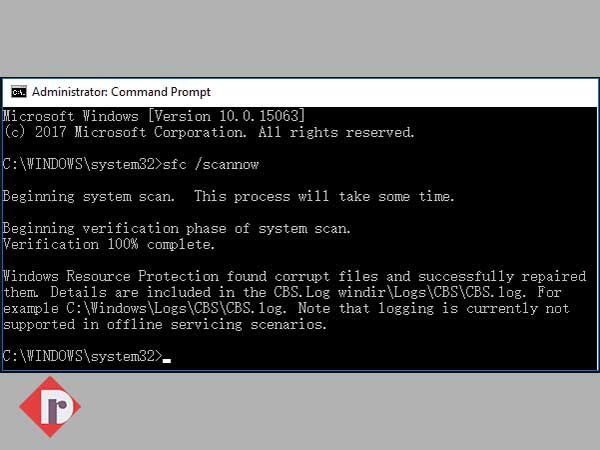
Once SFC scan is completed, reboot the system and try to access the files from the storage media.
Method 5: Resolve Cyclic Redundancy Check Data Error using Disk Check
Whether you know or not, the Disk Check Utility tool in Windows can also fix the file system error that caused you trouble by making your device inaccessible due to CRC error. So, here are the steps to resolve the Cyclic Redundancy Check data error from your computer using Disk Checker—
- First launch Windows File Explorer on your PC.
- Once launched, inside the Windows File Explorer, you have to click right on the inaccessible hard drive or even an inaccessible device.
- Then, choose the ‘Properties’ option of the same from the contextual menu that appears on the screen.
- Inside properties, navigate to the ‘Tools’ tab and click ‘Check’ in the Error-checking section.
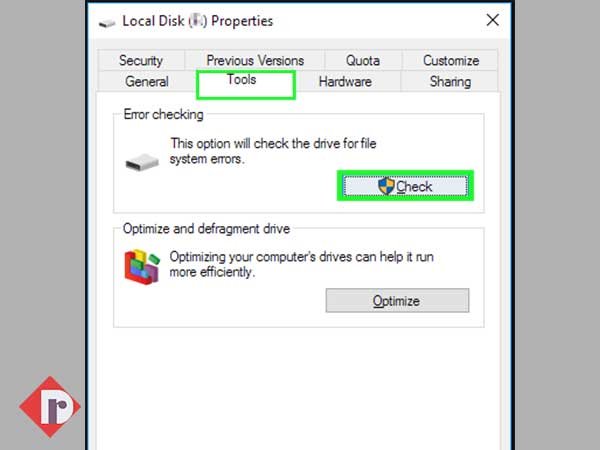
- In doing so, if the tool found any error then, what next you have to do is choose the ‘Scan drive’ or ‘Repair drive’ option to fix the error.
Method 6: Repair with the Professional Tool
Last but not least, if the above-mentioned methods don’t help you fix the error then, a professional tool is needed. The PST file repair tools can fix all sorts of corrupted as well as damaged PST File and at the same time, ensure the recovery of data without hampering the original quality. With said that, here are the top 4 Powerful PST repair tools recommended by users and MVPs that you can rely upon to repair corrupt data files. Have a look—
- Stellar Data Recovery Professional software
- Aryson PST Repair software
- Voimakas PST Recovery software
- DataNumen Repair software
Now let us explain to you Stellar Data Recovery Professional software, the first and highly trusted PST repair tool that has a rich and intuitive GUI to ensure a smooth PST files recovery process. The software was developed by data recovery experts with over 25 years of experience to effectively fix severely corrupted and large-sized PST files to help you Recover Data from a Storage Device with CRC Error.
How the Stellar Data Recovery Professional Software Works?
- First of all, download and Install the Stellar Data Recovery Professional software for your Windows PC.
- Then, simply connect the storage drive to the PC through a USB port. In doing so, if you’re asked to ‘Format Hard Drive’ via a pop-up message then, select ‘No’ to the same.
- After that, you can launch the download Stellar Data Recovery Professional software.
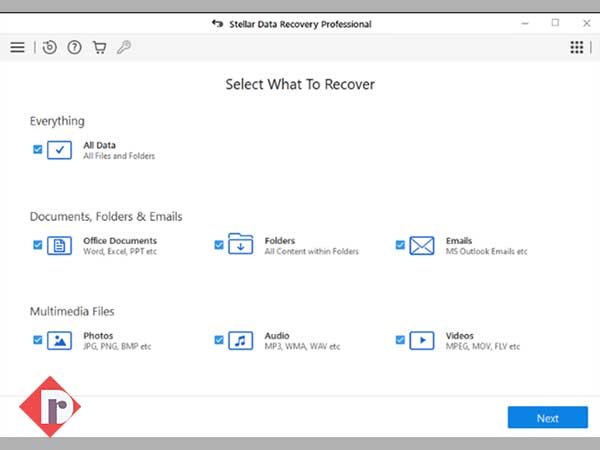
- Inside it, tick the ‘All Data’ checkbox to simply choose drive files, folders, and other deleted data from the external hard drive to recover. Alternatively, you can also check individual boxes.
- Once you’re done with the selection, click on the ‘Next’ button.
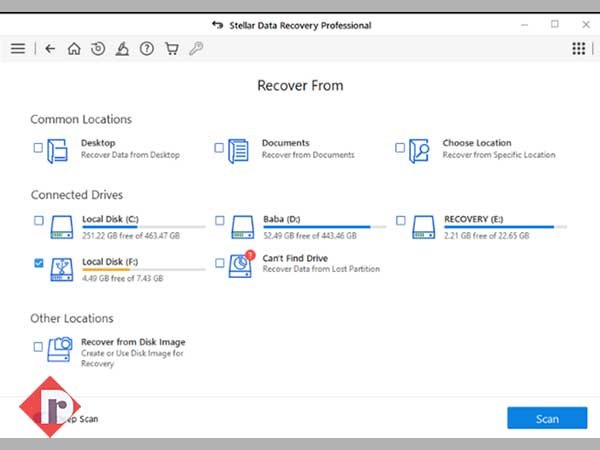
- After that, choose the connected storage drive and turn on the ‘Deep Scan’ option via these further steps—
- Basically, if you wish to recover your drive data from inaccessible, deleted, or unallocated partitions then, select the ‘Can’t Find Drive’ option under ‘Other Locations’ and simply click on the ‘Scan’ button.
- In continuation, select your drive on the next screen that opens and click on the ‘Search’ button under the ‘Partitions Found’ box to see all the list of deleted partitions.
- Then, select the partition and click on the ‘Scan’ button to start scanning. After that, in the scanning process, if nothing is found then, click the ‘Deep Scan’ link from the bottom of the page to start ‘Deep Scan.’
[Note: The Deep Scan option will take more time than usual. It’s because it thoroughly and deeply scans for the deleted data files inside the hard drive based on file signatures. And, in fact, it also helps you to even recover your RAW data.]
- Now, you’ll see all the recovered files and folders on the left side of the screen, inside the ‘Tree View’ tab.
- Then, from the left pane only, click on the ‘File Type’ tab to see all the listed files that are further segregated by their ‘Type.’ There, you can also click on a respective ‘File’ to preview it before you begin the recovery.
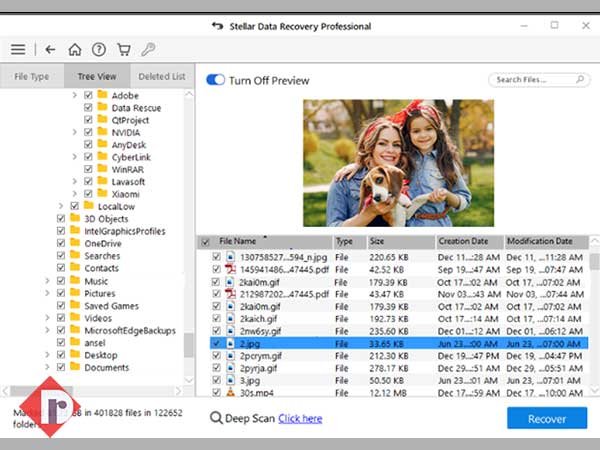
- After that, you have to tick-mark the checkboxes of data that you want to recover and to do so, click on the ‘Recover’ button.
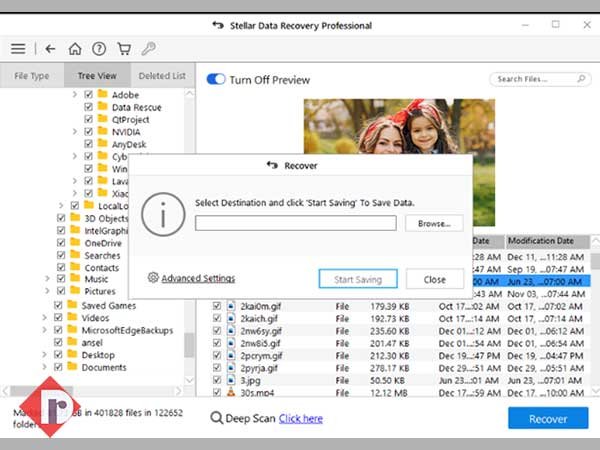
- In continuation, click on the ‘Browse’ button to select the destination where you want to save the recovered data/file.
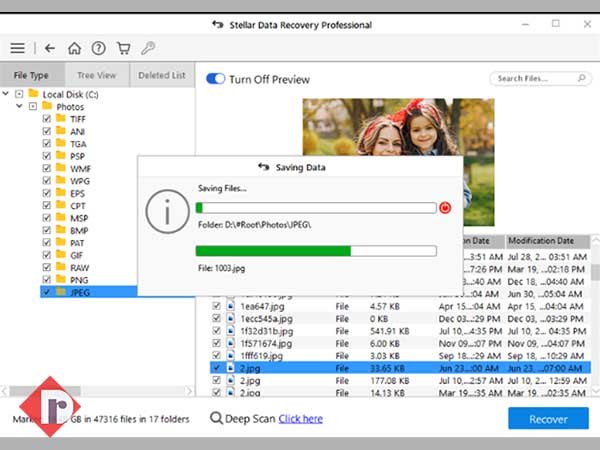
- And, once you’re done with the selection of location, click on the ‘Start Saving’ button.
- In doing so, all the selected recovered files and folders are saved at the desired location in your computer.
Conclusion
These are the top 6 methods that you can definitely give it a shot to fix the encountered CRC error. Also, to avoid this CRC error in the future, what you can do is schedule a weekly or monthly defragmentation task in your Windows PC and in addition, run CHKDSK every month to keep your hard disk safe and error-free from bad sectors.