
Are you fed up encountering Rackspace webmail login issues and looking for assistance on how you can sync your App.Rackspace.com email and Outlook together? Then, you firstly need to enlighten yourself that all third-party email clients except Hotmail, require a manual configuration approach of the incoming and outgoing servers to sync with Outlook.
So, in your case also, you don’t have the option to go for the automatic configuration process that can sync email accounts using their respective login credentials only. Instead, you’ll require the following App.Rackspace.com server settings to sync or setup your Rackspace email in Outlook—
IMAP and SMTP Server Settings of Rackspace Email Service for Outlook
| Account Type: | IMAP |
| Incoming Server Hostname: | secure.emailsrvr.com |
| Incoming Mail (IMAP) Secure Incoming Port: | 993 |
| Outgoing Server Hostname: | secure.emailsrvr.com |
| Outgoing Mail (SMTP) Secure Outgoing Port: | 465 |
| This Server Requires A Secure Connection: | SSL |
| Required Authentication: | [Yes] Your Rackspace email id and password. |
| Username: | Your Rackspace email account’s username |
| Password: | our Rackspace email account’s password |
POP and SMTP Server Settings of Rackspace Email Service for Outlook
| Account Type | POP |
| Incoming Server Hostname: | secure.emailsrvr.com |
| Incoming Mail (POP) Secure Incoming Port: | 995 |
| Outgoing Server Hostname: | secure.emailsrvr.com |
| Outgoing Mail (SMTP) Secure Outgoing Port: | 465 |
| This Server Requires A Secure Connection: | SSL |
| Required Authentication: | [Yes] Your Rackspace email id and password. |
| Username: | Your Rackspace email account’s username |
| Password: | Your Rackspace email account’s password |
Now, using these aforementioned app.Rackspace.com Outlook settings and below-mentioned steps of the manual setup process, let’s learn how you can sync Rackspace and Outlook together—
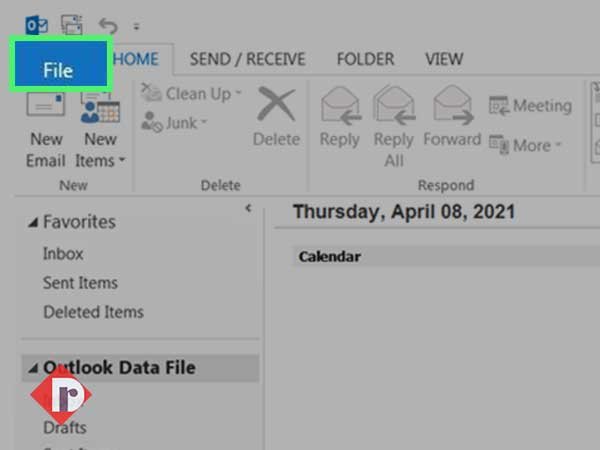
Step 1: Launch Outlook application on your desktop and select the File option.
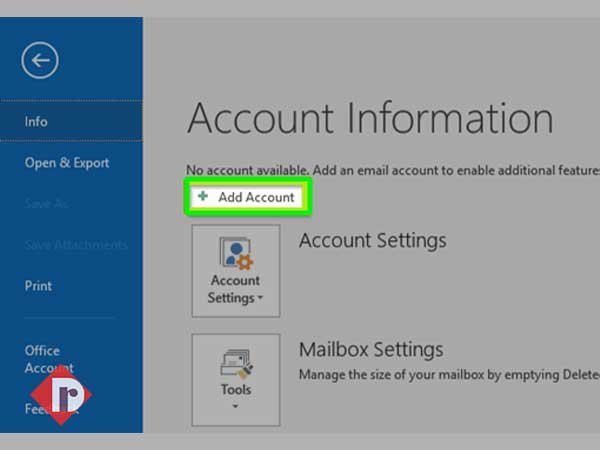
Step 2: Then, click on the Add Account box from the Info section.
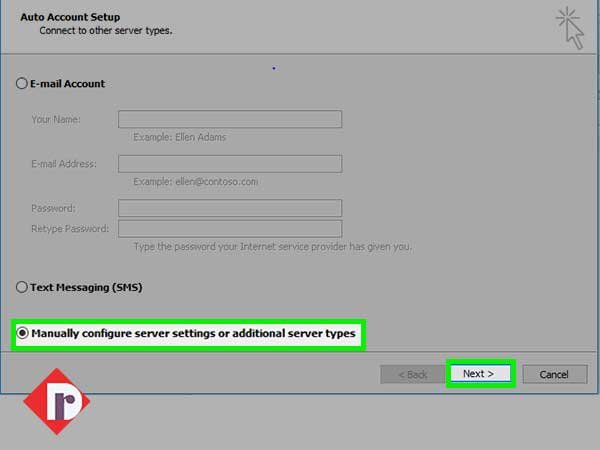
Step 3: After that, select the radio button of Manual setup or additional server types and click on the Next button.
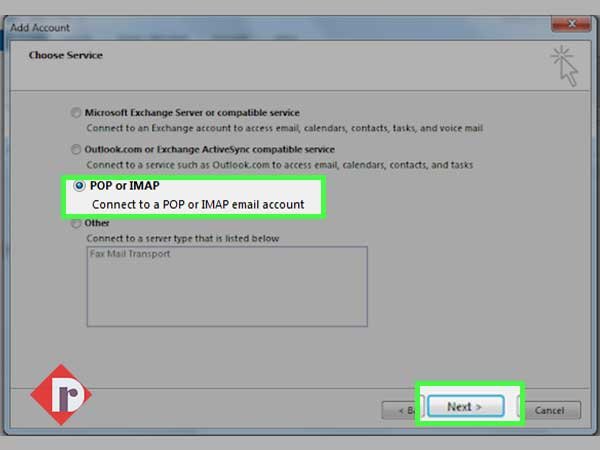
Step 4: Similarly, select POP or IMAP option and again, click on the Next button.
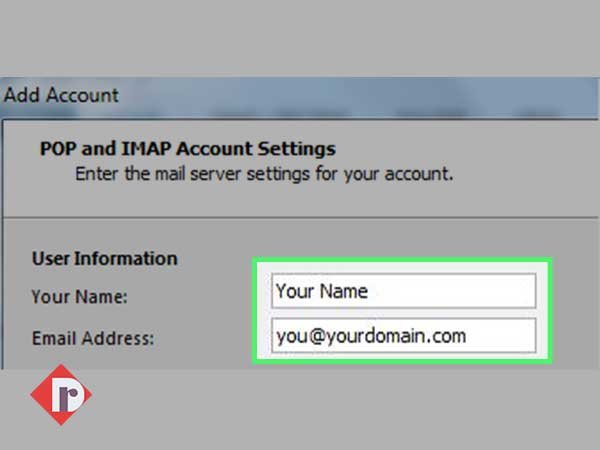
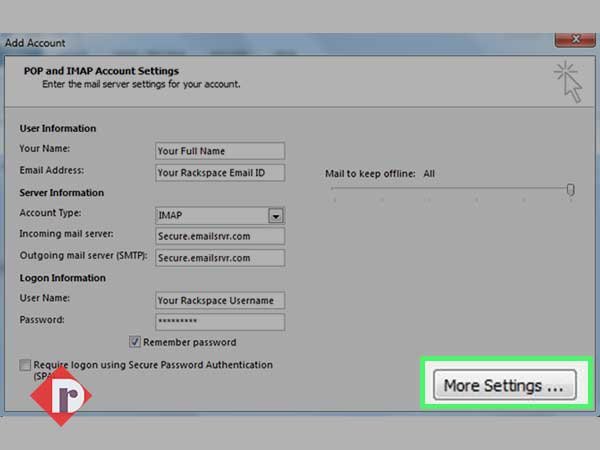
Step 5: Now, enter Your Name and Rackspace account’s Email Address in the respective asked text fields of User Information section.
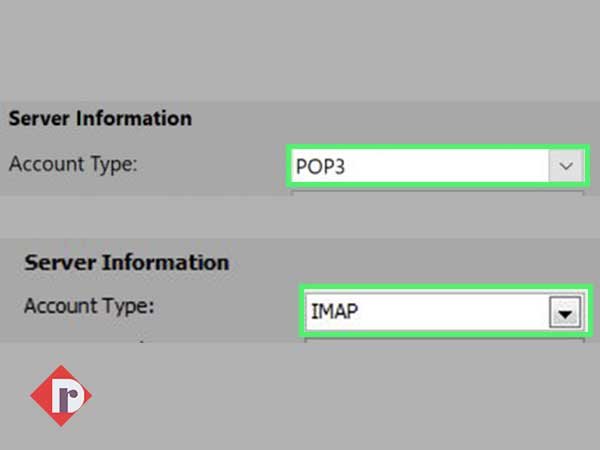
Step 6: Further, in the Server Information section, select either IMAP or POP as your account-type.
| Step 7: | In continuation, enter the following Rackspace email settings—
|
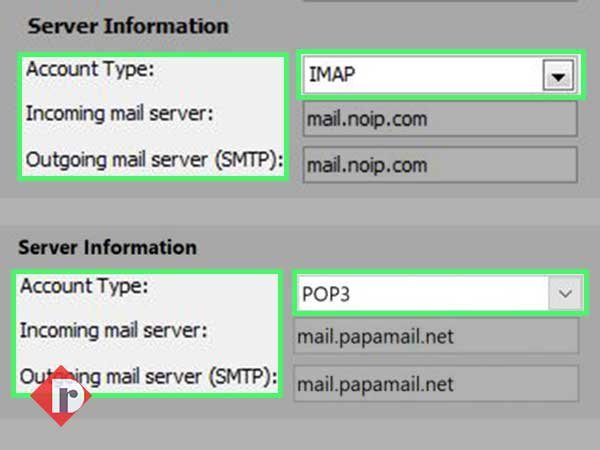
Step 7: In continuation, enter the following Rackspace email settings—
- Secure.emailsrvr.com in Incoming mail server (IMAP/POP) &
- Secure.emailsrvr.com in Outgoing mail server (SMTP)
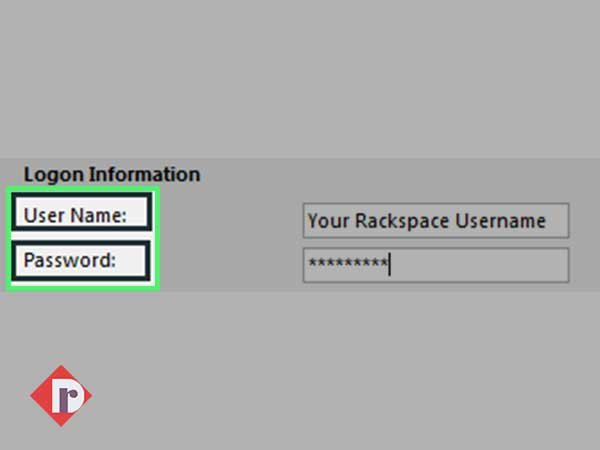
Step 8: Next, enter the Email address and Password that are associated with your Rackspace email account in the asked Login Information section.
Step 9: Once you’re done, move forward to the Internet E-mail Settings page by clicking on the More Settings option.
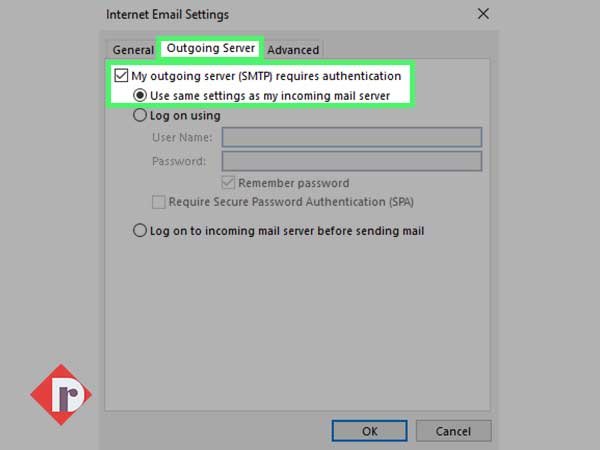
Step 10: There, select the Outgoing Server tab and check these options—
- ‘My outgoing server (SMTP) requires authentication.’‘
- Use Same Settings as my incoming mail server.’
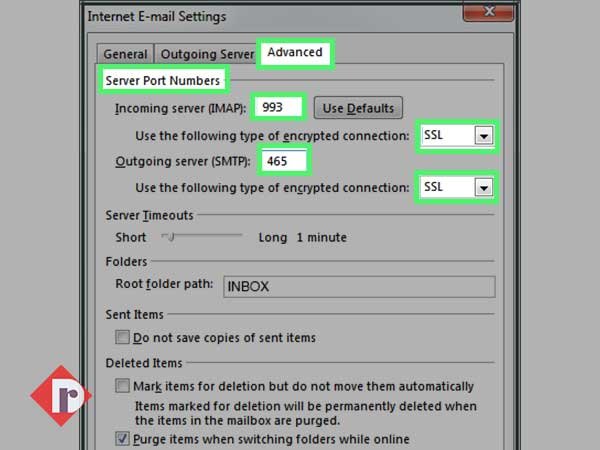
Step 11: Afterwards, shift to the Advanced tab and inside the same-
- Enter 995 & select SSL for Incoming server (POP3) / Enter 993 & select SSL for Incoming server (IMAP)&
- Enter 465 or 587 & select SSL for Outgoing server (SMTP)
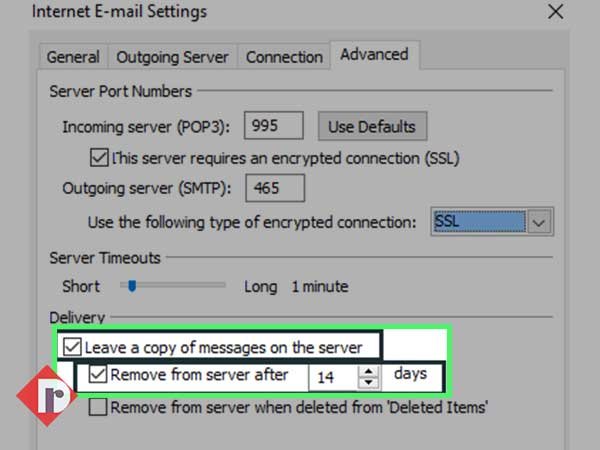
Step 12: Last but not least, tick-mark ‘Leave a copy of messages on the server’ and ‘Remove from server after 14 days’ checkboxes under Delivery section.
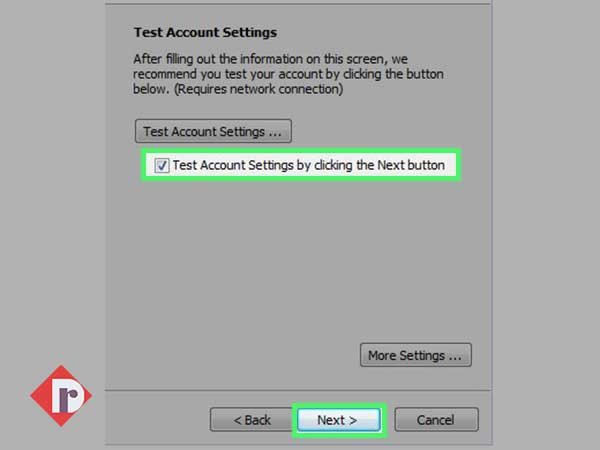
Step 13: In the end, click on the Next button to test account settings whether you’ve correctly synced your Rackspace email in Outlook. Well, if everything seems fine, hit the Close button to end the configuration process.
So, that’s the complete steps of the manual configuration process, using which you can set up your Rackspace email account in Outlook to sync both Rackspace and Outlook together in case you’re fed up with encountering issues while ‘Log in to Apps.Rackspace.Com Webmail Account.’