
Emails are the prominent mode of communication and used by millions of people to communicate on personal as well as professional level. Outlook is one of the best email clients and holds the 2nd top position in the email niche. Outlook functionality is very much complex as it is a desktop-based email client. It highly depends on the many files such as OST and PST which makes it unique among users.
OST file is an offline storage file which is created by default by the Outlook. It helps users continue their work in the absence of the exchange server. Later it synchronizes data into the online mail server. Due to various reasons, OST files may get corrupted and become inaccessible. Therefore, OST to PST conversion is required in order to protect data.
Why OST to PST Conversion is Needed?
Sometimes it becomes a crucial task to convert OST into PST format to retrieve lost data.
- Due to a crash in Exchange Server, users’ mailbox becomes distant. However, you can work with OST file in offline mode, but you can’t synchronize it with the Exchange Server. If it is immediately needed to access the mailbox in order to make some changes over it, you need a conversion of OST file into PST format.
- Switching from one organization to other may need OST to PST conversion.
- If you’ve accidentally deleted your crucial data from the mailbox, the only method to recover them is by converting the OST file into PST format.
File corruption can also push users for OST to PST conversation. The only and best option left for users is OST to PST conversion via a 3rd party professional tool. However, Microsoft provides Scanost.exe, the inbuilt tool which helps to recover data. But it’s not powerful enough in case of dreadful corruption.
Here are Top Three Manual Methods to Convert OST to PST.
Move OST Data to PST with Archive Option
It is an inbuilt feature in Outlook, which allows migrating the data stored in OST file to PST. To do so follow below steps:
- Open the Outlook application in your device
- Open the OST file in Outlook. Ensure that User Offline Folders is enabled to open OST
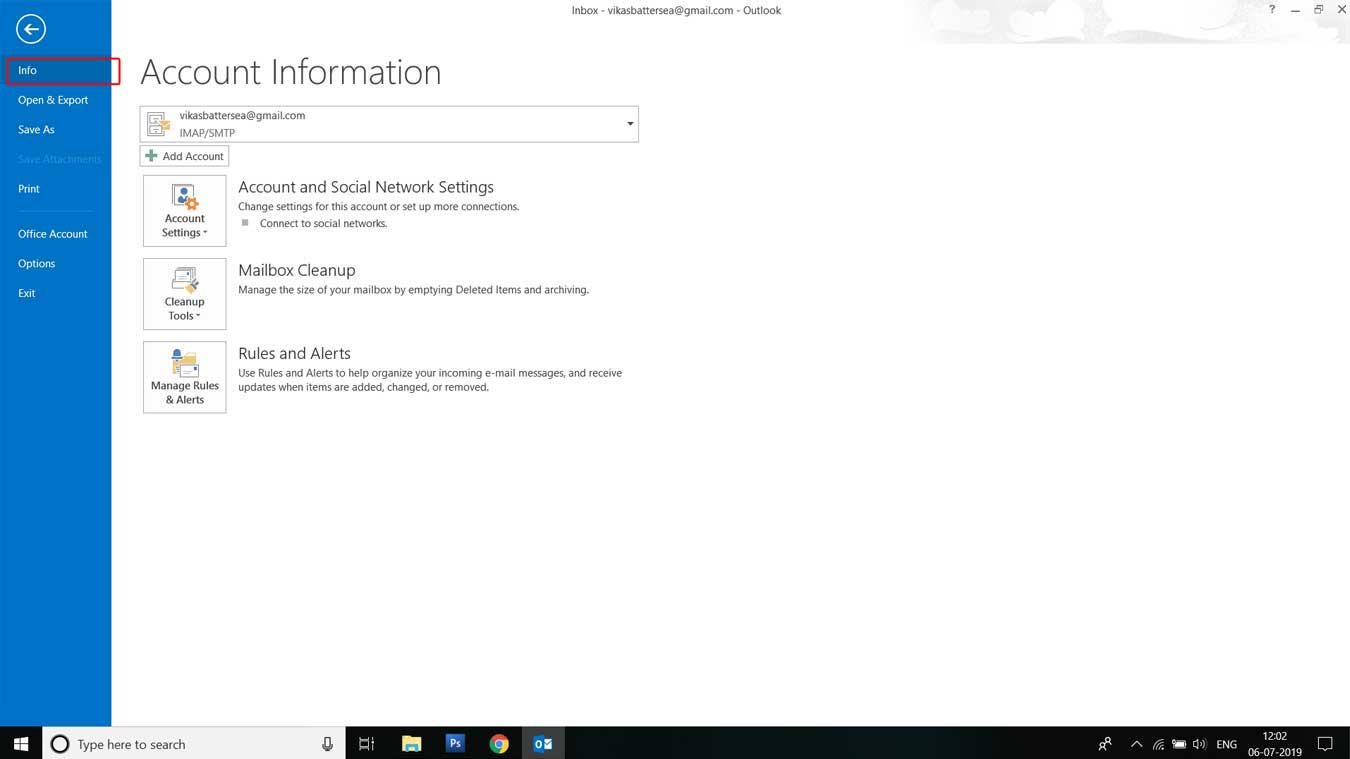
- Navigate through the menu bar, click on File and move to Info
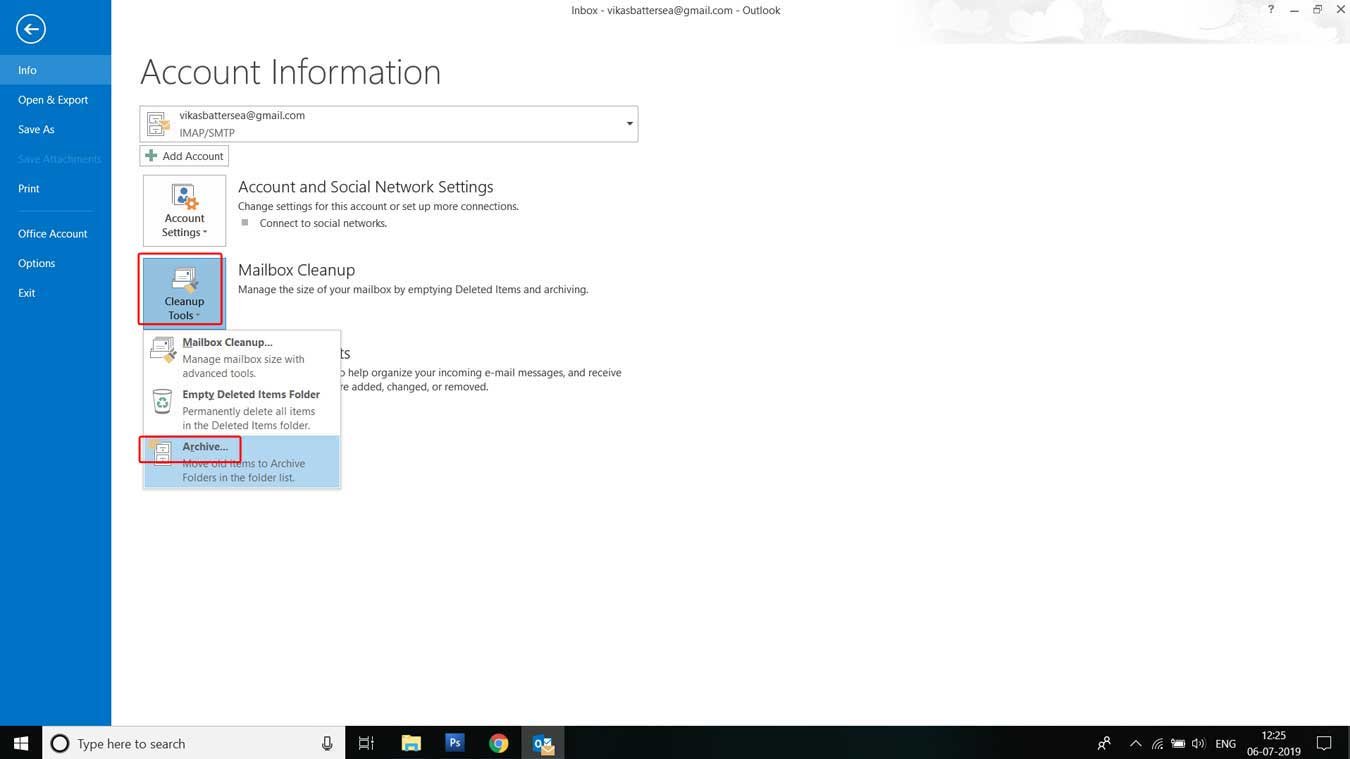
- Expand the Cleanup Tools option and select Archive
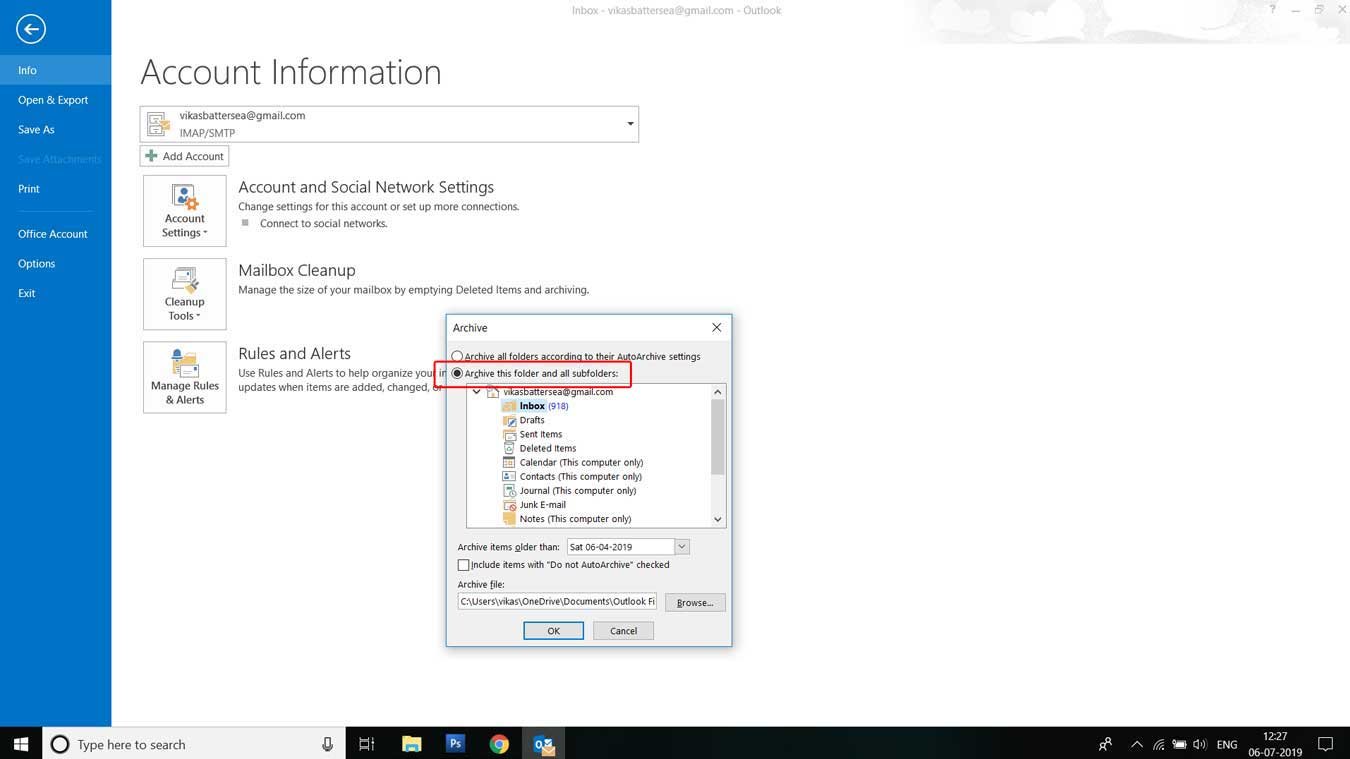
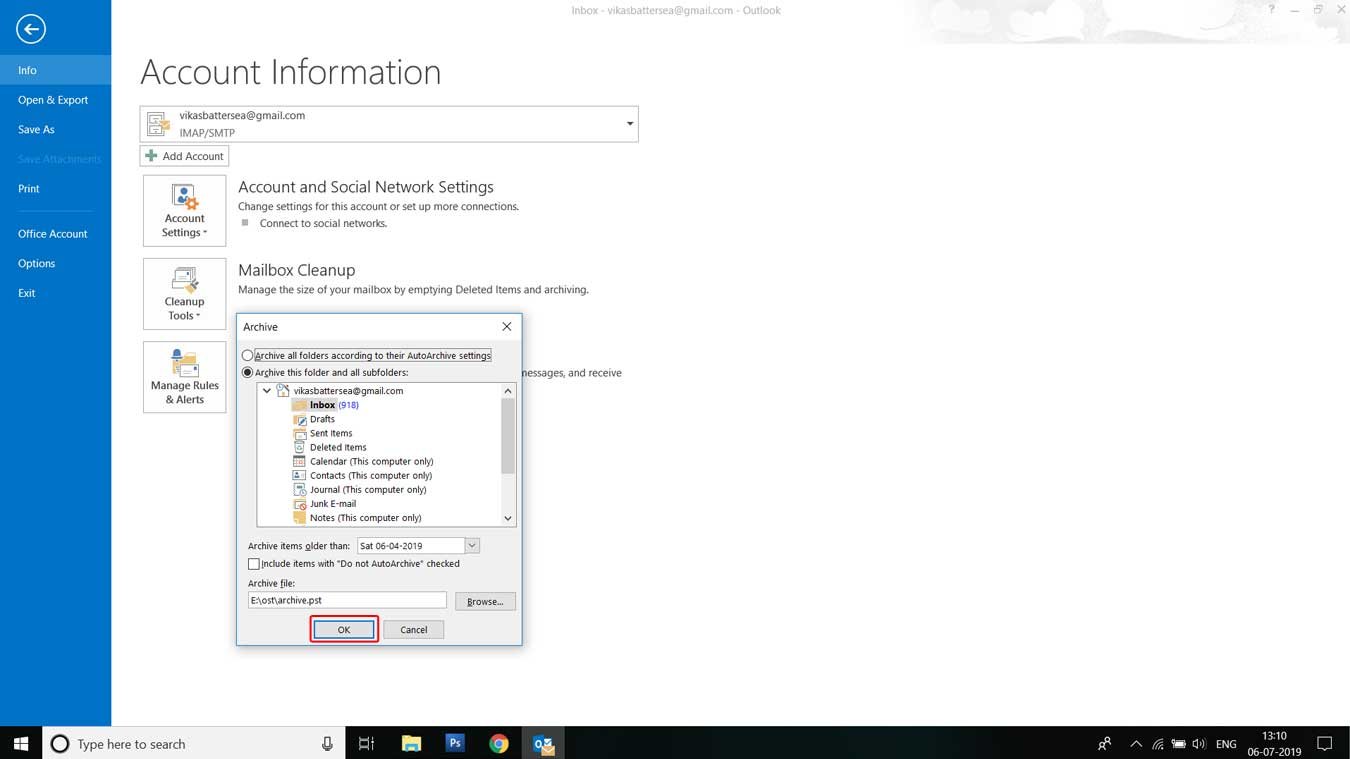
- The Archive window will open, select the option ‘Archive this folder and all subfolders’
- From the mailbox, choose any of the folders you want to move such as Inbox, Drats, Sent items.
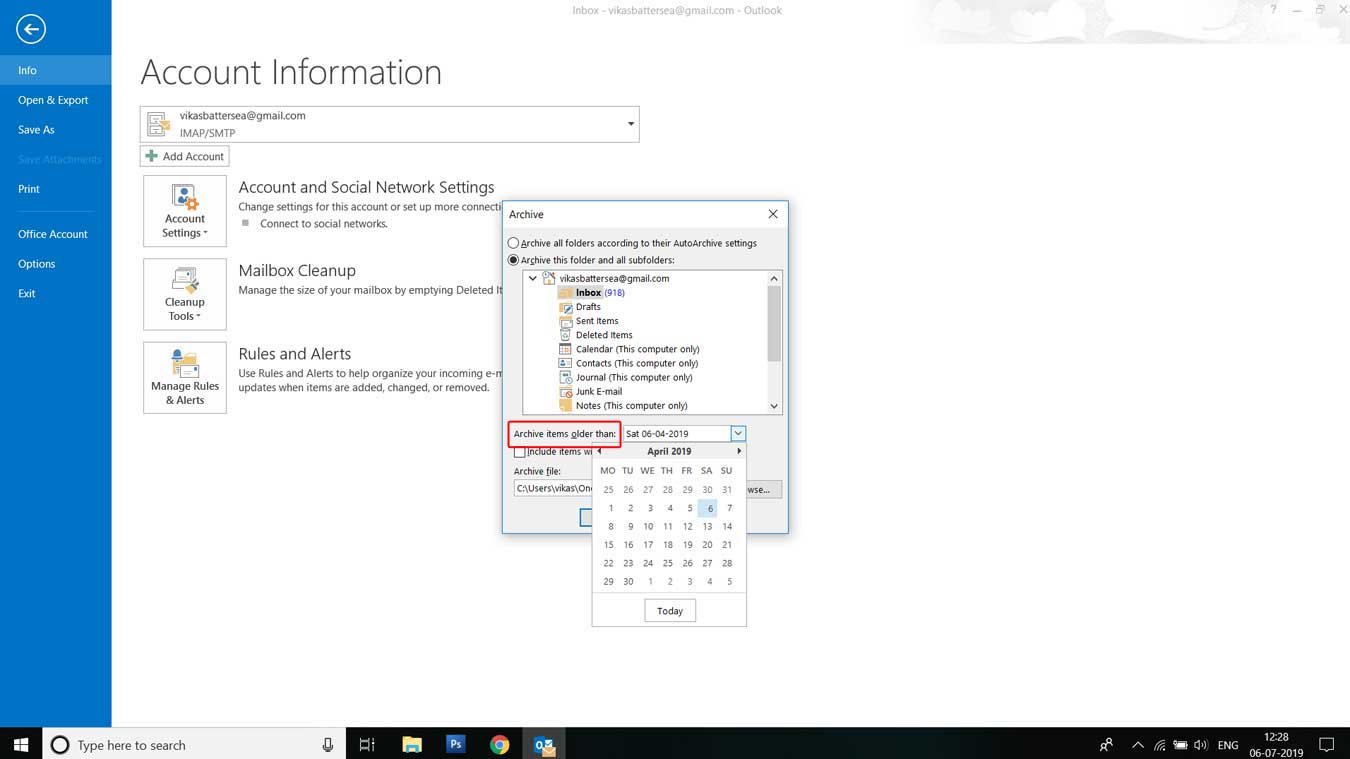
- Then go to option ‘Archive items older than’ from the pin-down menu, choose the date up to which you want to export the items, it may be weeks or months ago.
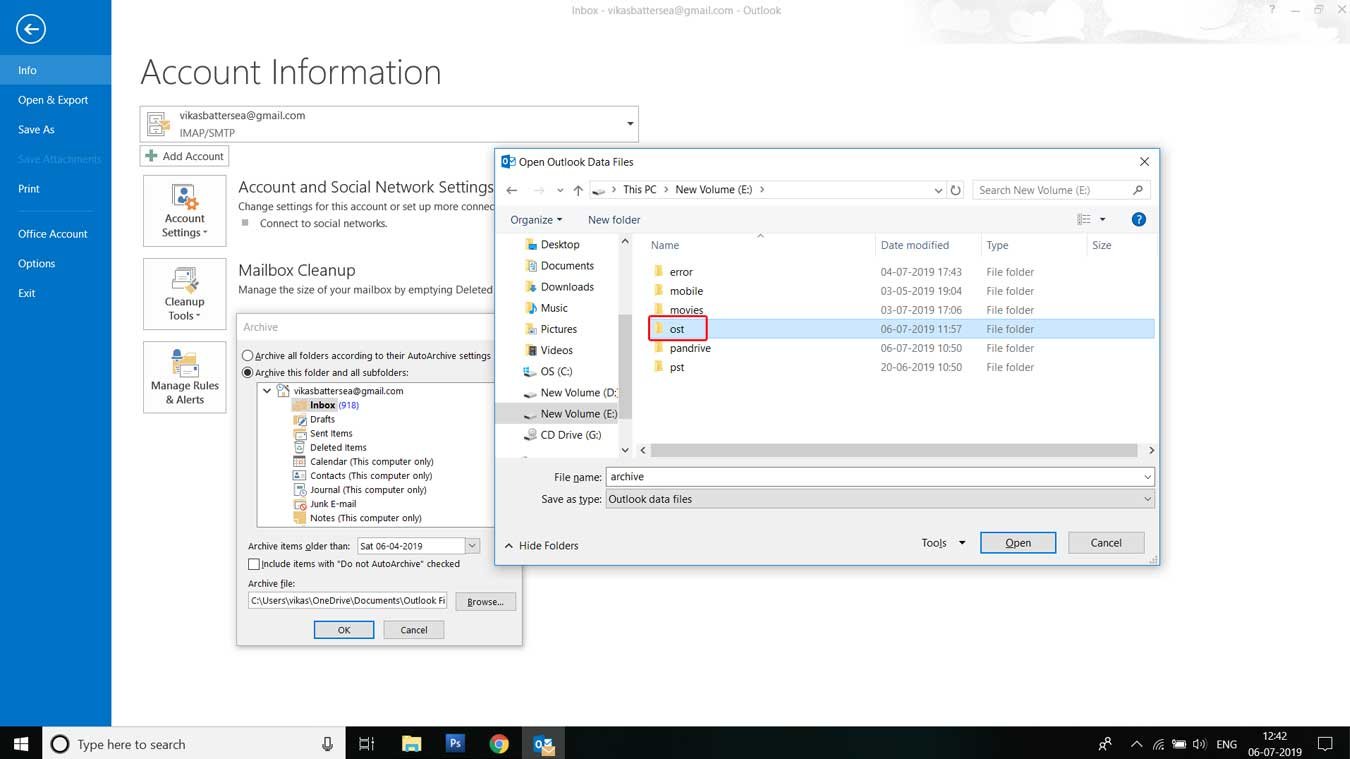
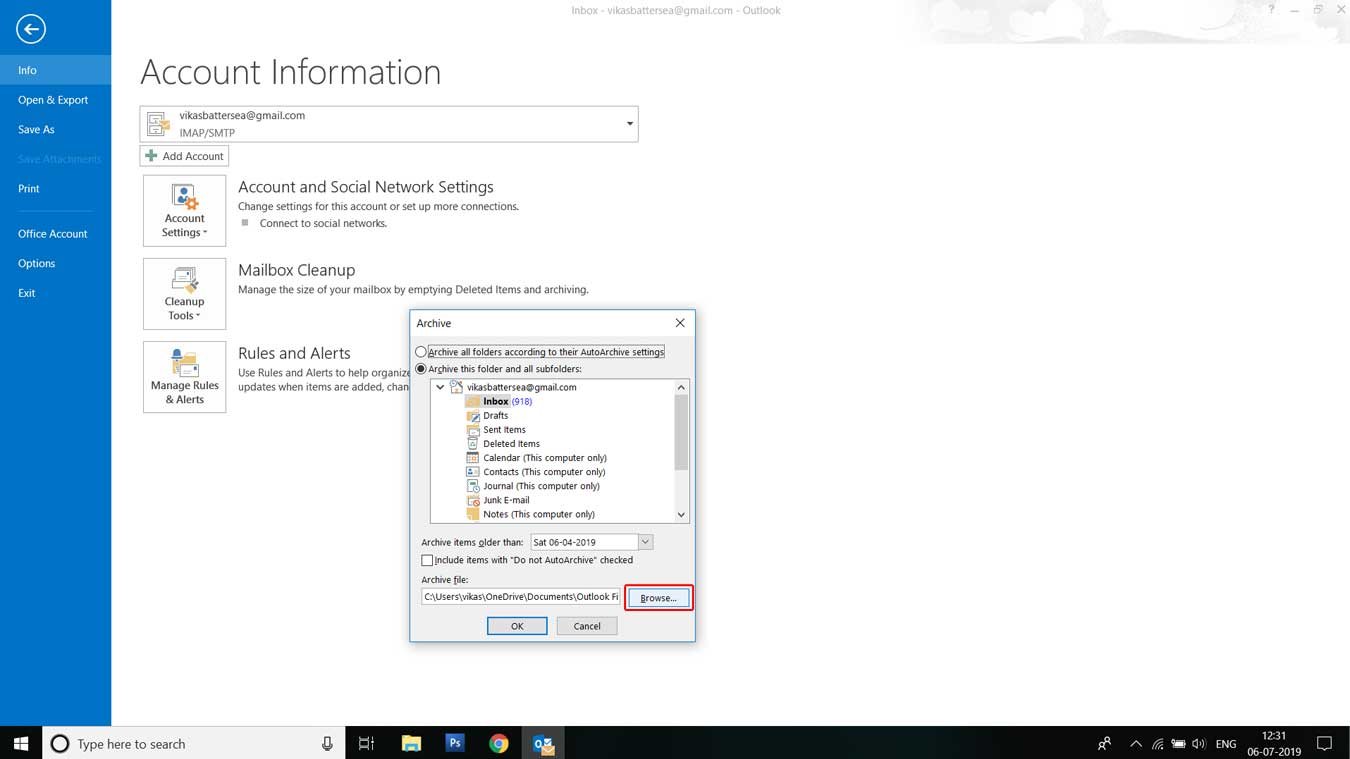
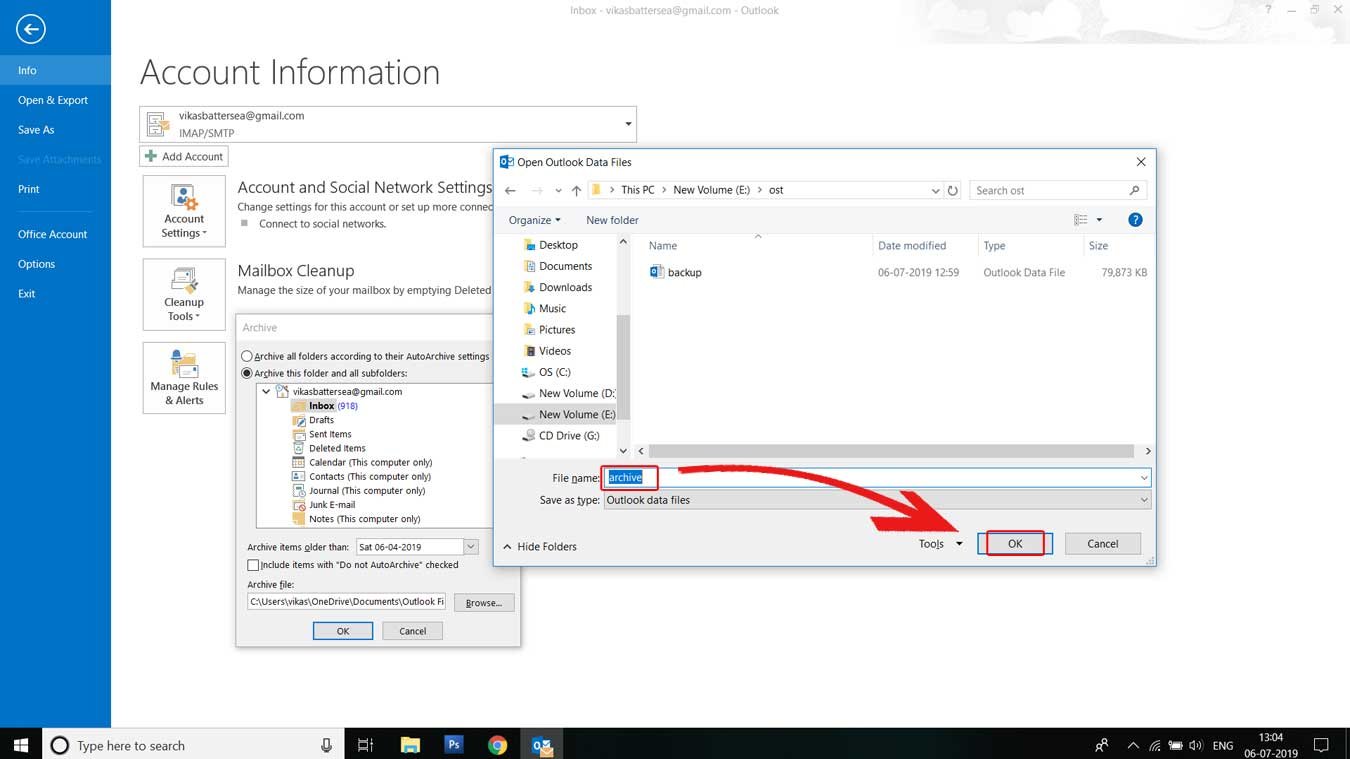
- After the date selection, click on the browse tap.
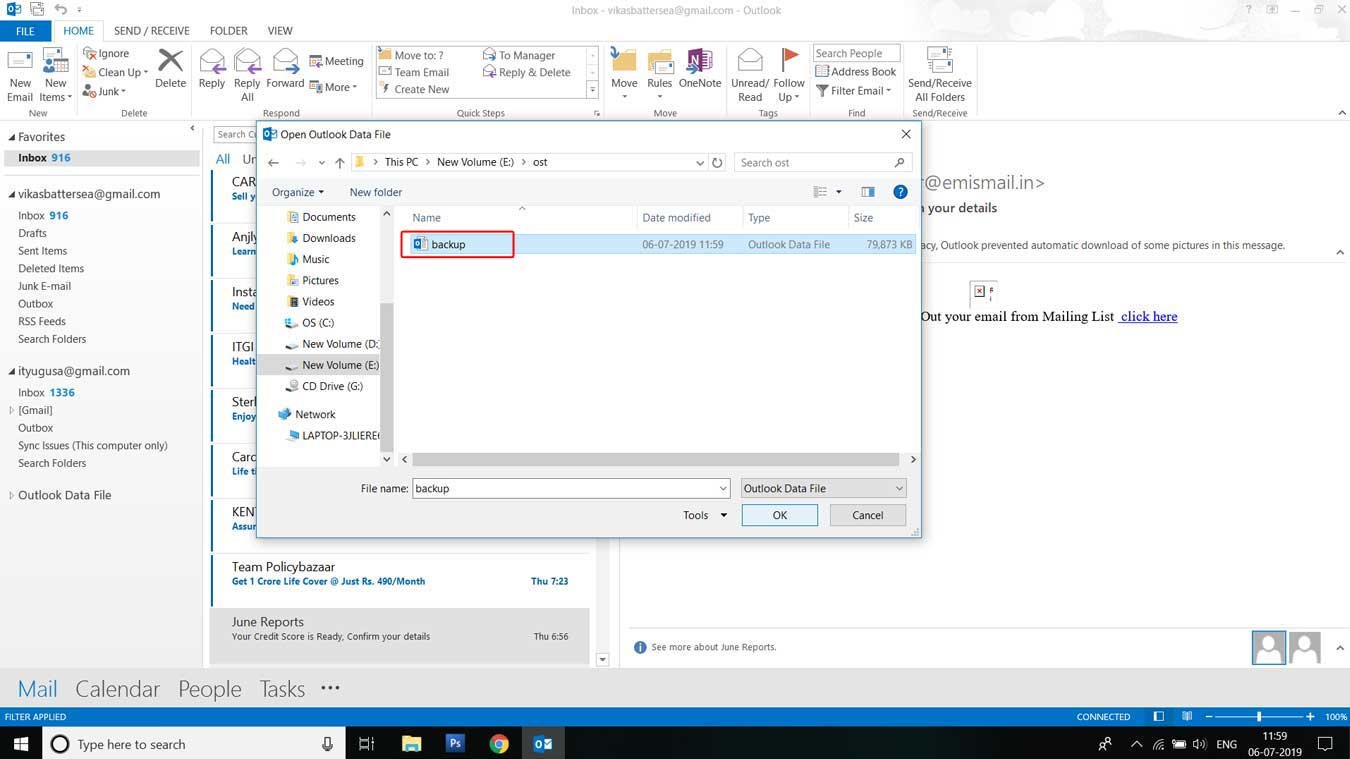
- Choose a folder to save the new PST file
- Type a name it and tap OK. The archived items will move to this location.
- Click OK button and the start the process
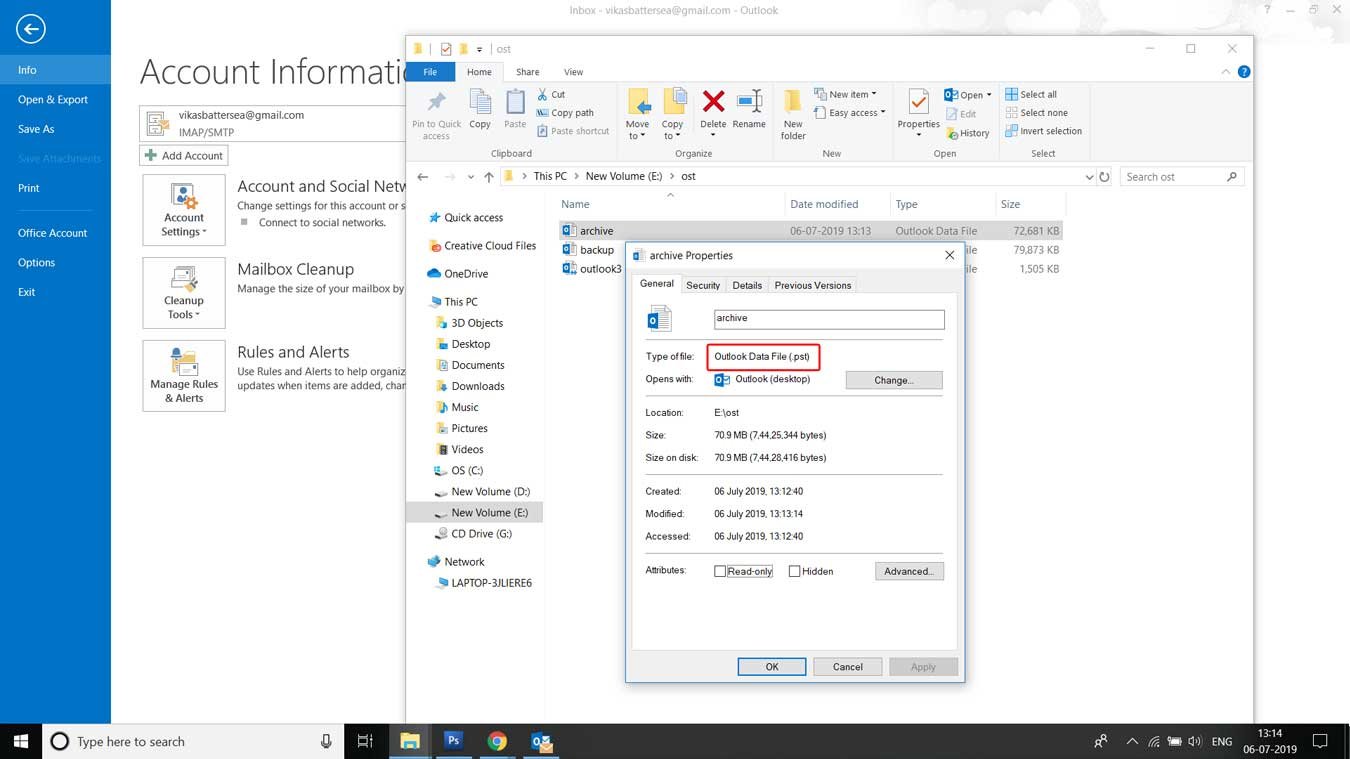
- The files and folders will move to archive PST
- The OST data is saved to the PST format.
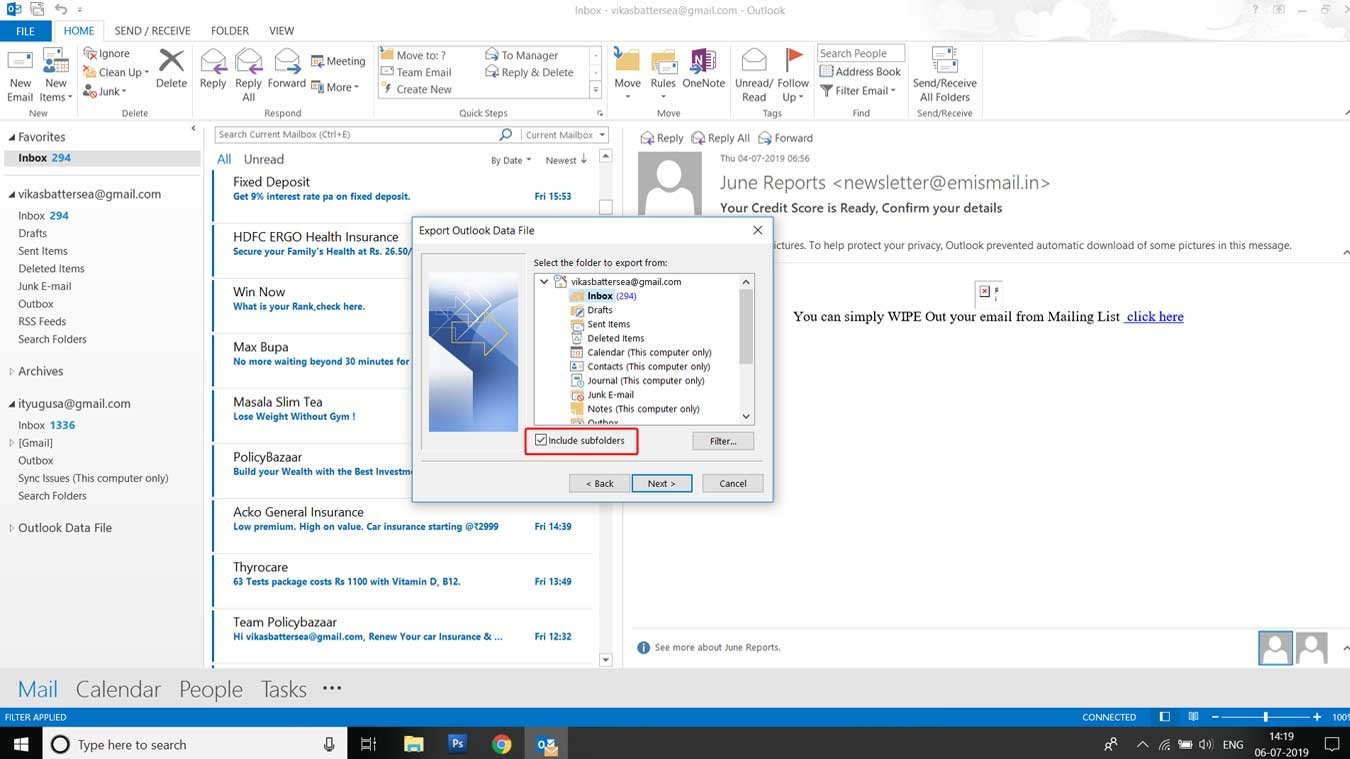
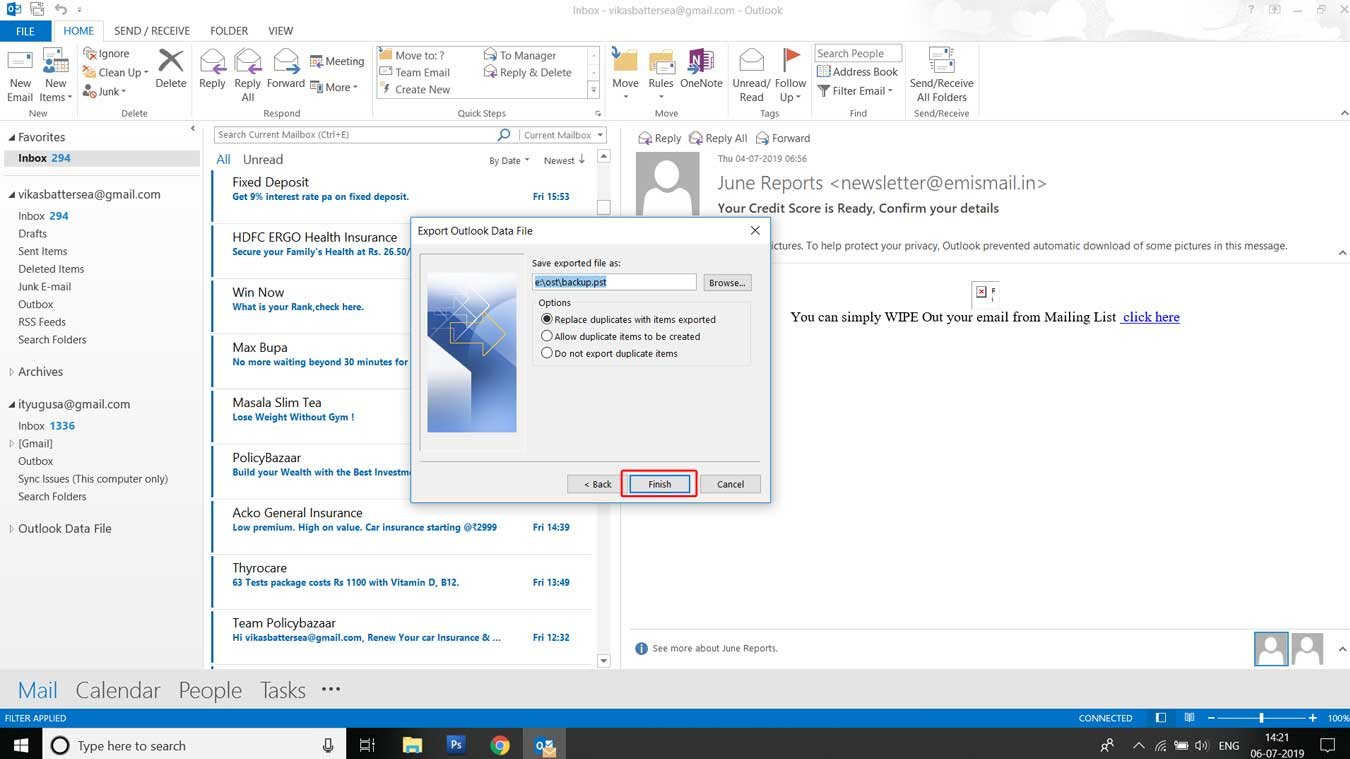
Export OST Data to New PST
The Outlook Export/ Import feature is useful in various ways to relocate files from one email to other.
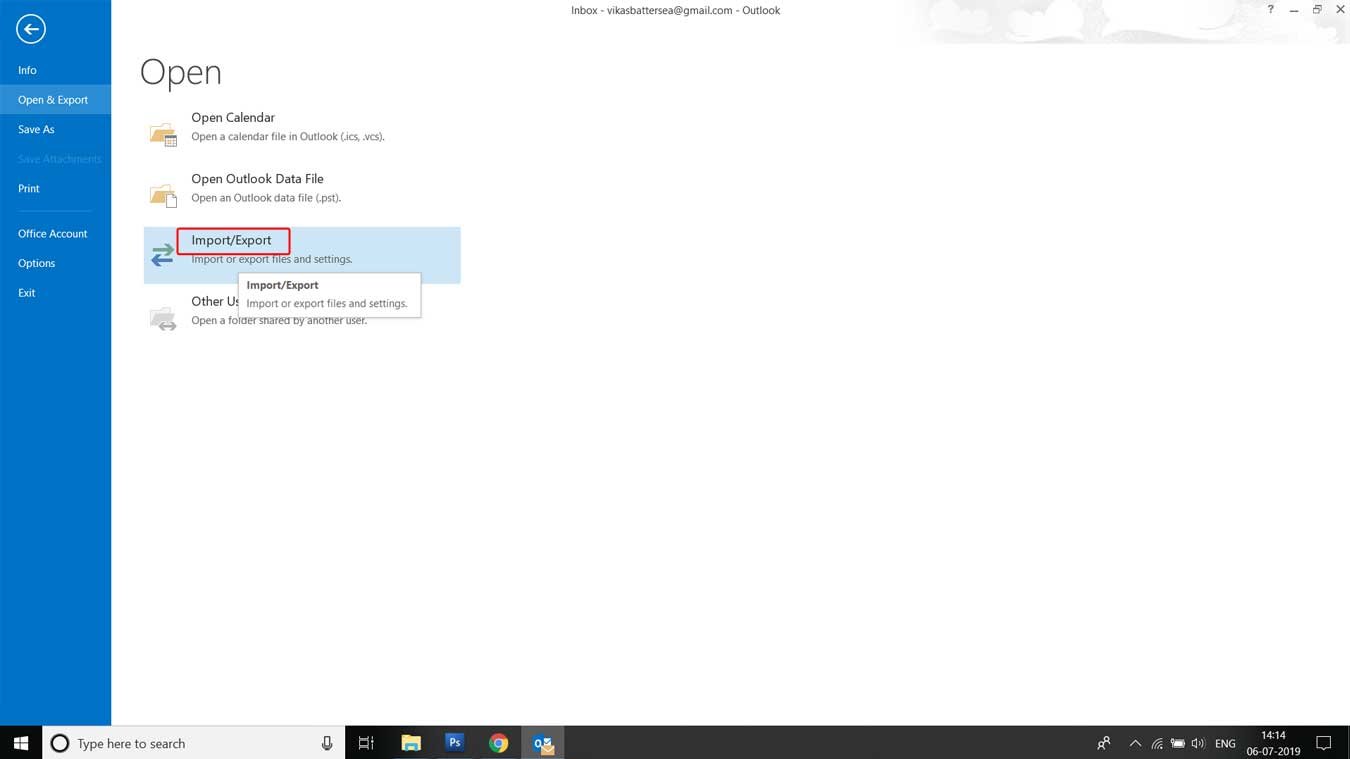
- Open the MS Outlook email on your device
- Go to File, Open and choose Import
- The Import/ Export box will open, select the ‘Export to a file’ and click on Next.
- On the next windows select ‘Outlook Data File (.pst)’ and tap the next button.
- You will be prompted to export the OST file, then select the desired folder you want to move.
- Checkmark the ‘Include Subfolders’ option and click Next.
- Now click on browse and create a new PST file and choose it.
- Click on Finish to start the export process.
- The OST data will be moved to new PST.


Drag and drop files and folders to new PST is another method available, however, it is not applicable for default folders such as Inbox, Drafts, and sent-items so user usually avoids it because is also a time-consuming process.
Third Party Recovee OST to PST Converter
The manual process of moving OST file to PST can be done only in the presence of actual Outlook profile which is used to generate OST file. If access to the original profile is not available, the above-mentioned method may not work. In such a case, using third-party OST to PST converter will be a wise and speedy option for users. Recovee OST to PST converter is the best available tool over the Internet. It offers various high-tech and quality features to users at a reasonable cost. It gives a fast and secure scan to inaccessible OST files and saves OST data into various formats such as PST, EML, MSG, TXT, RTF, and MHTML. Its Demo version is available free of cost which makes it worth using.